Rock and Roll Bed, Part 7: All Done!

9 09 2014

Just a year after the bench cushions, I finally made the cover for the mattress above the engine bay. Got it now done because DrJ gave me a weekend-course on her sewing machine as this year’s birthday present (many thanks, my love!). The long zipper that runs around one-and-a-half sides of the final piece made it all a bit more complicated than I had expected. Same beautiful plaid material from bus-ok.de as used for the bench. I gave up on getting the pattern of this last piece aligned with the pattern of the two bench mattress pieces. But I am still very happy with the final product. So that’s it, rock and roll bench/bed, finally done and dusted!

Image_01

Image_02

Image_04

Image_05

Image_08

Image_09

Image_10

Image_11

Image_13

Image_15

Image_16


Rock and Roll Bed, Part 6: Bench Cushions

7 09 2014

I finally find time to complete the story of building the rock and roll bed in the back of our kombi: The bench-bed-combination was already built in summer 2012 (complete thread here). Already a year ago, in July 2013, I made the bench and backrest covers: I bought this beautiful plaided material from bus-ok.de (part number OK60072). It comes in two different color combinations, one of them this yellow-and-green one that is pretty close to what Westfalia would have used in sage green VW buses like Taiga Lily. It is a reproduction, but very thick and stable material. Useless as curtain material which I had hoped to use it for as well, but looks very durable as bench seat cover. I measured carefully the dimensions of the different mattress pieces in an original late bay Westfalia camper (many thanks to Reini for letting me check out your camper!). The 8cm-thick-foam pieces were purchased from Weissbach in Berlin – not cheap, but we could test-sit and -lie on them, they cut them on the spot to my measurements, and they also had the zipper and the sewing machine thread for the covers. With help from DrJ I got the sewing machine running to sew the seams in the corners. Finally I tuckered the new covers onto the wooden bench and backrest. Particularly proud of how well the lines in the pattern on the seat and on the backrest cover – have a look at the photos!

Image_01

Image_02

Image_03

Image_04

Image_05

Image_06

My very first steps with a sewing machine - exciting!

My very first steps with a sewing machine – exciting!

Also added two fold-out feet from Reimo under the seat board for extra stability, see the fotos at the very end. No time at that moment to sew the cover for the mattress piece above the engine bay. I just cut that piece to adjust it to the asymmetric rear side walls and covered it, for the time being, with an old duvet cover. The time being lasted another year – more in the next post.

Image_08

Image_09

Image_10

Image_11

Image_12

Image_13

Image_14


Rock and Roll Bed, Part 5: Safety Features

25 07 2013

Picking up the thread on building the rock and roll bed in the back of my kombi: Last summer I got the basics done in time for last year’s Berlin Bus Festival. Here is the complete thread. Last September I added a safety mechanism, a locking mechanism that prevents the bench from opening. Important when you roll the car in an accident and you don’t want all your tools flying around and into your head. Never thought much about this, but with a baby daughter now as the main passenger in the back, I found myself looking into safety more seriously. The mechanism seems to be around for a long time already and can still be bought via the German campervan specialist Reimo (German “Sitzbankverriegelung”, Reimo part number 58060). The detailed technical drawings that came with the Reimo Rock and Roll Bed hinges actually show already where exactly this bolting mechanism has to be attached to the bench seat and front panel. A catch behind the front panel locks into a hook that is bolted through the bench seat panel. The catch can be released by pulling a knob on the front of the front panel, see the photos below.

Image1

Image2

Image3

Image4

While I was at it, I also added a second small fire extinguisher under the bench. It complements a first fire extinguisher I had installed under the dashboard when I bought the van. The idea being that the front one is at hand when the engine catches fire while the back one is for when one manages to set the curtains on fire when cooking in the kitchen. Historically, a lot of buses were apparently lost due to engine fires. Zero-to-sixty-eventually just recently posted on good quality fuel lines and a fuel shut off valve as precautions to prevent engine fires in Volkswagen buses – check out his blog post and links therein. I had added the bench lock mechanism and the second fire extinguisher already last September. All became very suddenly very relevant four days ago when I drove Taiga Lily on the Autobahn on a very hot Sunday afternoon and a little Seat hatchback caught fire five cars ahead of me. I stopped and emptied the 2 kg front fire extinguisher into the engine bay, but could not stop the fire fully. Two lessons learnt: Place under bench not good for easy reach when seat cannot be folded up quickly, due to heavy baby seat on top of it. And: Two kilograms of powder are gone really quickly. Today I bought the replacement for the empty front extinguisher, and a second two-kilogramm extinguisher as more serious backup than the one-kilogramm one under the back bench.

Image5


Rock And Roll Bench, Part 4: Done!

27 07 2012

Now the bench is complete. Last step was to bolt the side panels of the bench through the floor to the car. I used two of the four bolts I had put in some weeks ago to fix the floor plate solidly to the car. The rear two bolts were within the footprint of the bench, so with the right brackets they are now also holding the bench to the car. The idea is that Taiga Lily will have a temporary campervan conversion: Unscrewing the bench from the brackets on the floor and from the two attachment points on the engine bay will allow to take the rock and roll bench out, and another 12 bolts will then bring the original back bench in again. But for the moment, it is great to have a bus again that can be used as a campervan! Tomorrow we will start to the Berlin Bus Festival, for a three day camping weekend.

Before: The original back bench…

… and now with rock and roll bench…

… and pulled out to form the bed.

What is still missing are cushions for the seat and backrest and for the area above the engine bay which also will serve as a mattress for the bed. For the time being we borrowed the cushions for the seat and backrest from the Old Lady, our older bus. On top of that we will put an Ikea mattress, also from the Old Lady, which fits behind the back rest when folded once in the middle. With these cushions, the whole unit is starting to look comfy! Nice side effect is also that with the mattress and the cushions in place, the engine is quite less noisy.

For those interested in more details: The complete bench is quite heavy, turns out to weigh about 31 kg. Below are some more snapshots: The side walls are each bolted through the floor using a bracket and an 8mm machine bolt (very large washer). A second bracket on each side is just screwed into the floor plate Turned out the distance of nine centimeter between the side wall of the bus and the side panel of the bench was indeed crucial: With this distance, the bench can be folded without crashing against the roll-up units of the three-point-seatbelts which are fixed to the side walls just behind the back rest.

Rear safety belt (right side of the bus)

Safty belt, left side.

Position with regard to sliding door.


Rock And Roll Bench, Part 3: Final Steps

26 07 2012

Now the seat board is complete, with an opening cut out as a handle for when the bench is pulled into a bed, with two brackets attached which will keep it horizontal when in bed-position, and with it being sanded and coated with varnish twice. All the other boards will be treated at some point in the future. Now there was just not enough time because the bed has to be functional for the Berlin VW Bus Festival starting on July 27.

The final positioning of the bench in the bus was as far forward as possible to get the maximum bed length (in the end 186 cm). But that meant that that an attachment point at the rear end of each of the hinges was not touching the tilted front wall of the engine bay, but showed a gap of about four to five centimeters. Ideally, it would touch the panel so that one can drill a hole through it and attach each hinge firmly to the car. The final solution will be to take the hinges out again and get an extension welded to them so that they do touch the wall. As a quick solution, I now bridged the gap with a wooden bar that runs from the left to the right hinge, with a screw that goes into a 6mm drive-in nut on the back of the bar. The bar is then fixed to the engine compartment via two existing attachment points which are for the back rest of the original back bench (red arrows in last photo below). So at least there is no extra hole drilled into the body.

Unwanted gap between hinge and back wall (front wall of the engine bay) highlighted by red arrow.


Rock And Roll Bench, Part 2: All Coming Together

26 07 2012

I started with cutting the outer edges of the front panel to follow the curvature of the walls of the bus. Then I test-assembled all pieces, but with the side panels rotated by 90° so that the bench was too high. From this model I measured how high the bed level will be and how much I had to lower the side walls and the attachment points for the hinges to get it all level with the engine compartment in our kombi. Also, this model allowed to measure how far the bed was protruding backwards so that I could start planning how much forward in the bus I could place the bench to get the longest possible sleep area.

Front panel already adjusted to curvature of the bus side walls. Side panels still too high, to check how much they need to go down.

I then took of the hinges and upper part off again, cut down the side panels and cut out a first section for the rear wheel housing, reassembled the front and side panels and took it into the bus to measure how much more I had to cut out of the side panels to adjust them to the wheel housings. Then the whole bench was put together, now for the first time with all pieces in the right place/with the right hight, and placed in the car for fine-tuning.

First test placement in the car.

Curvature of side panel at the rear wheel housing not right yet.

First test placement of the fully assembled bench in the bus.


Rock And Roll Bench, Part 1: Getting Started

24 07 2012

I finally got started with building the rock-and-roll bed, a bench in the back of the kombi that can be pulled out to form a bed. I bought the mechanism two years ago from the German kombi supplier bus-ok.de, advertised as suitable for T1, T2 and T3. They came without any instructions, but the guys at bus-ok.de said that basically all the hinges on the market are clones of the originals ones from Reimo, a German campervan conversion specialist. And for those I had instructions because I had built them into our old bus, the Old Lady, in 2002. These instructions can also be found here on the internet. My sheets are labeled 2002 instead of 1990, but otherwise they are exactly the same. So in 2010 I put the new hinges aside and nothing happened for two years. Now with the Berlin Bus Festival starting in a few days, I finally picked up the thread again some two weeks ago. I got the boards cut in a local DIY market, in birch multiplex because I really like it. I went for the strength recommended in the Reimo instructions: 15 mm for front and side walls and 21 mm for the sitting board and back rest (19 mm as recommended by Reimo were not available in this material).

Leon Dogwonder with the boards for the new bench.

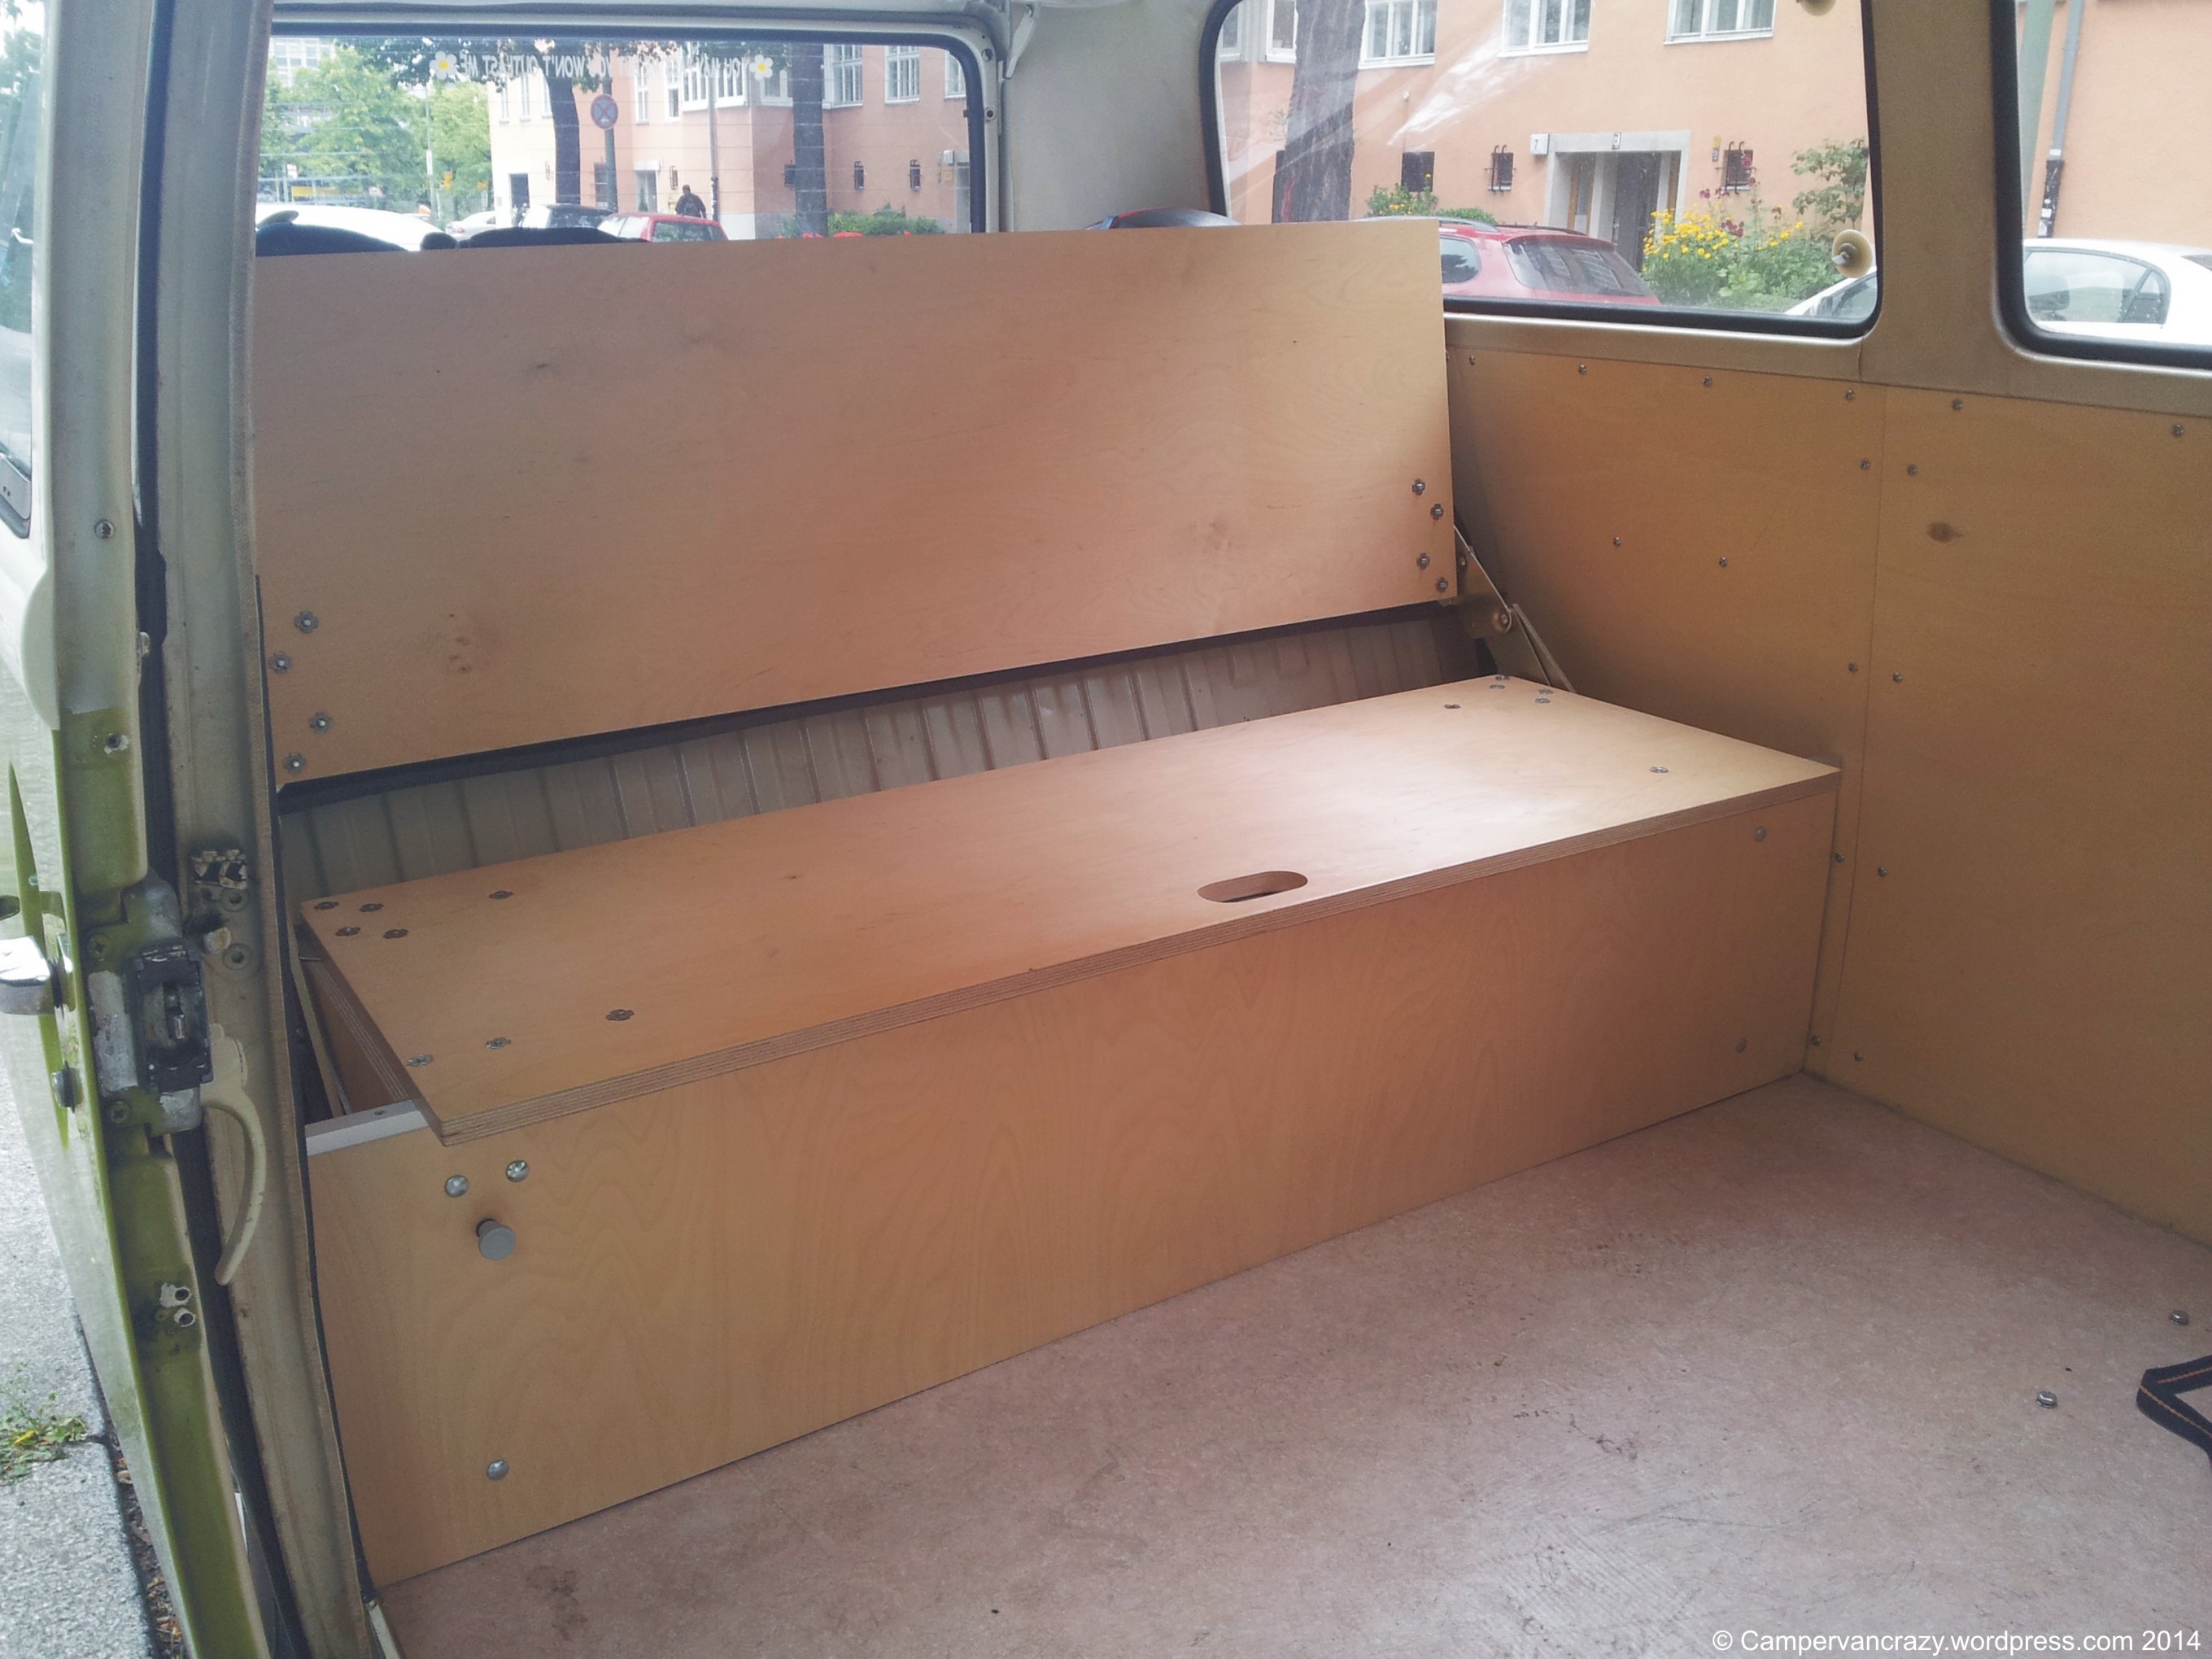
Hinges shown in the two positions, bench and bed, testwise attached to the side boards.

Hinges seen from the backside.

To give you an idea of how the finished bed-bench combination can look, I will add some photos of the Old Lady below. Taken in a dark underground garage, so it all looks a bit dodgy and dusty, but you will get the idea. One can also still buy the Reimo rock-and-roll bed mechanism I had used in the Old Lady. The set is officially for the Volkswagen T3/T25 bus (08/1979-07/1990) (Reimo part number 58001) and designed so that the bed level is 12 cm higher than the T3 motor compartment so that the bed can/should be combined with a 12 cm high storage room on the engine compartment. The same hinge can also be used for the T2 without storage space above the engine as the engine compartment of the T2 was just that much higher anyway. In the Old Lady I had increased the bench hight from 36 to 40 cm so that I could keep a 4 cm storage space above the engine. Good to keep tools and spare parts. But as a drawback one was sitting just those 4 cm too high and too close to the ceiling.

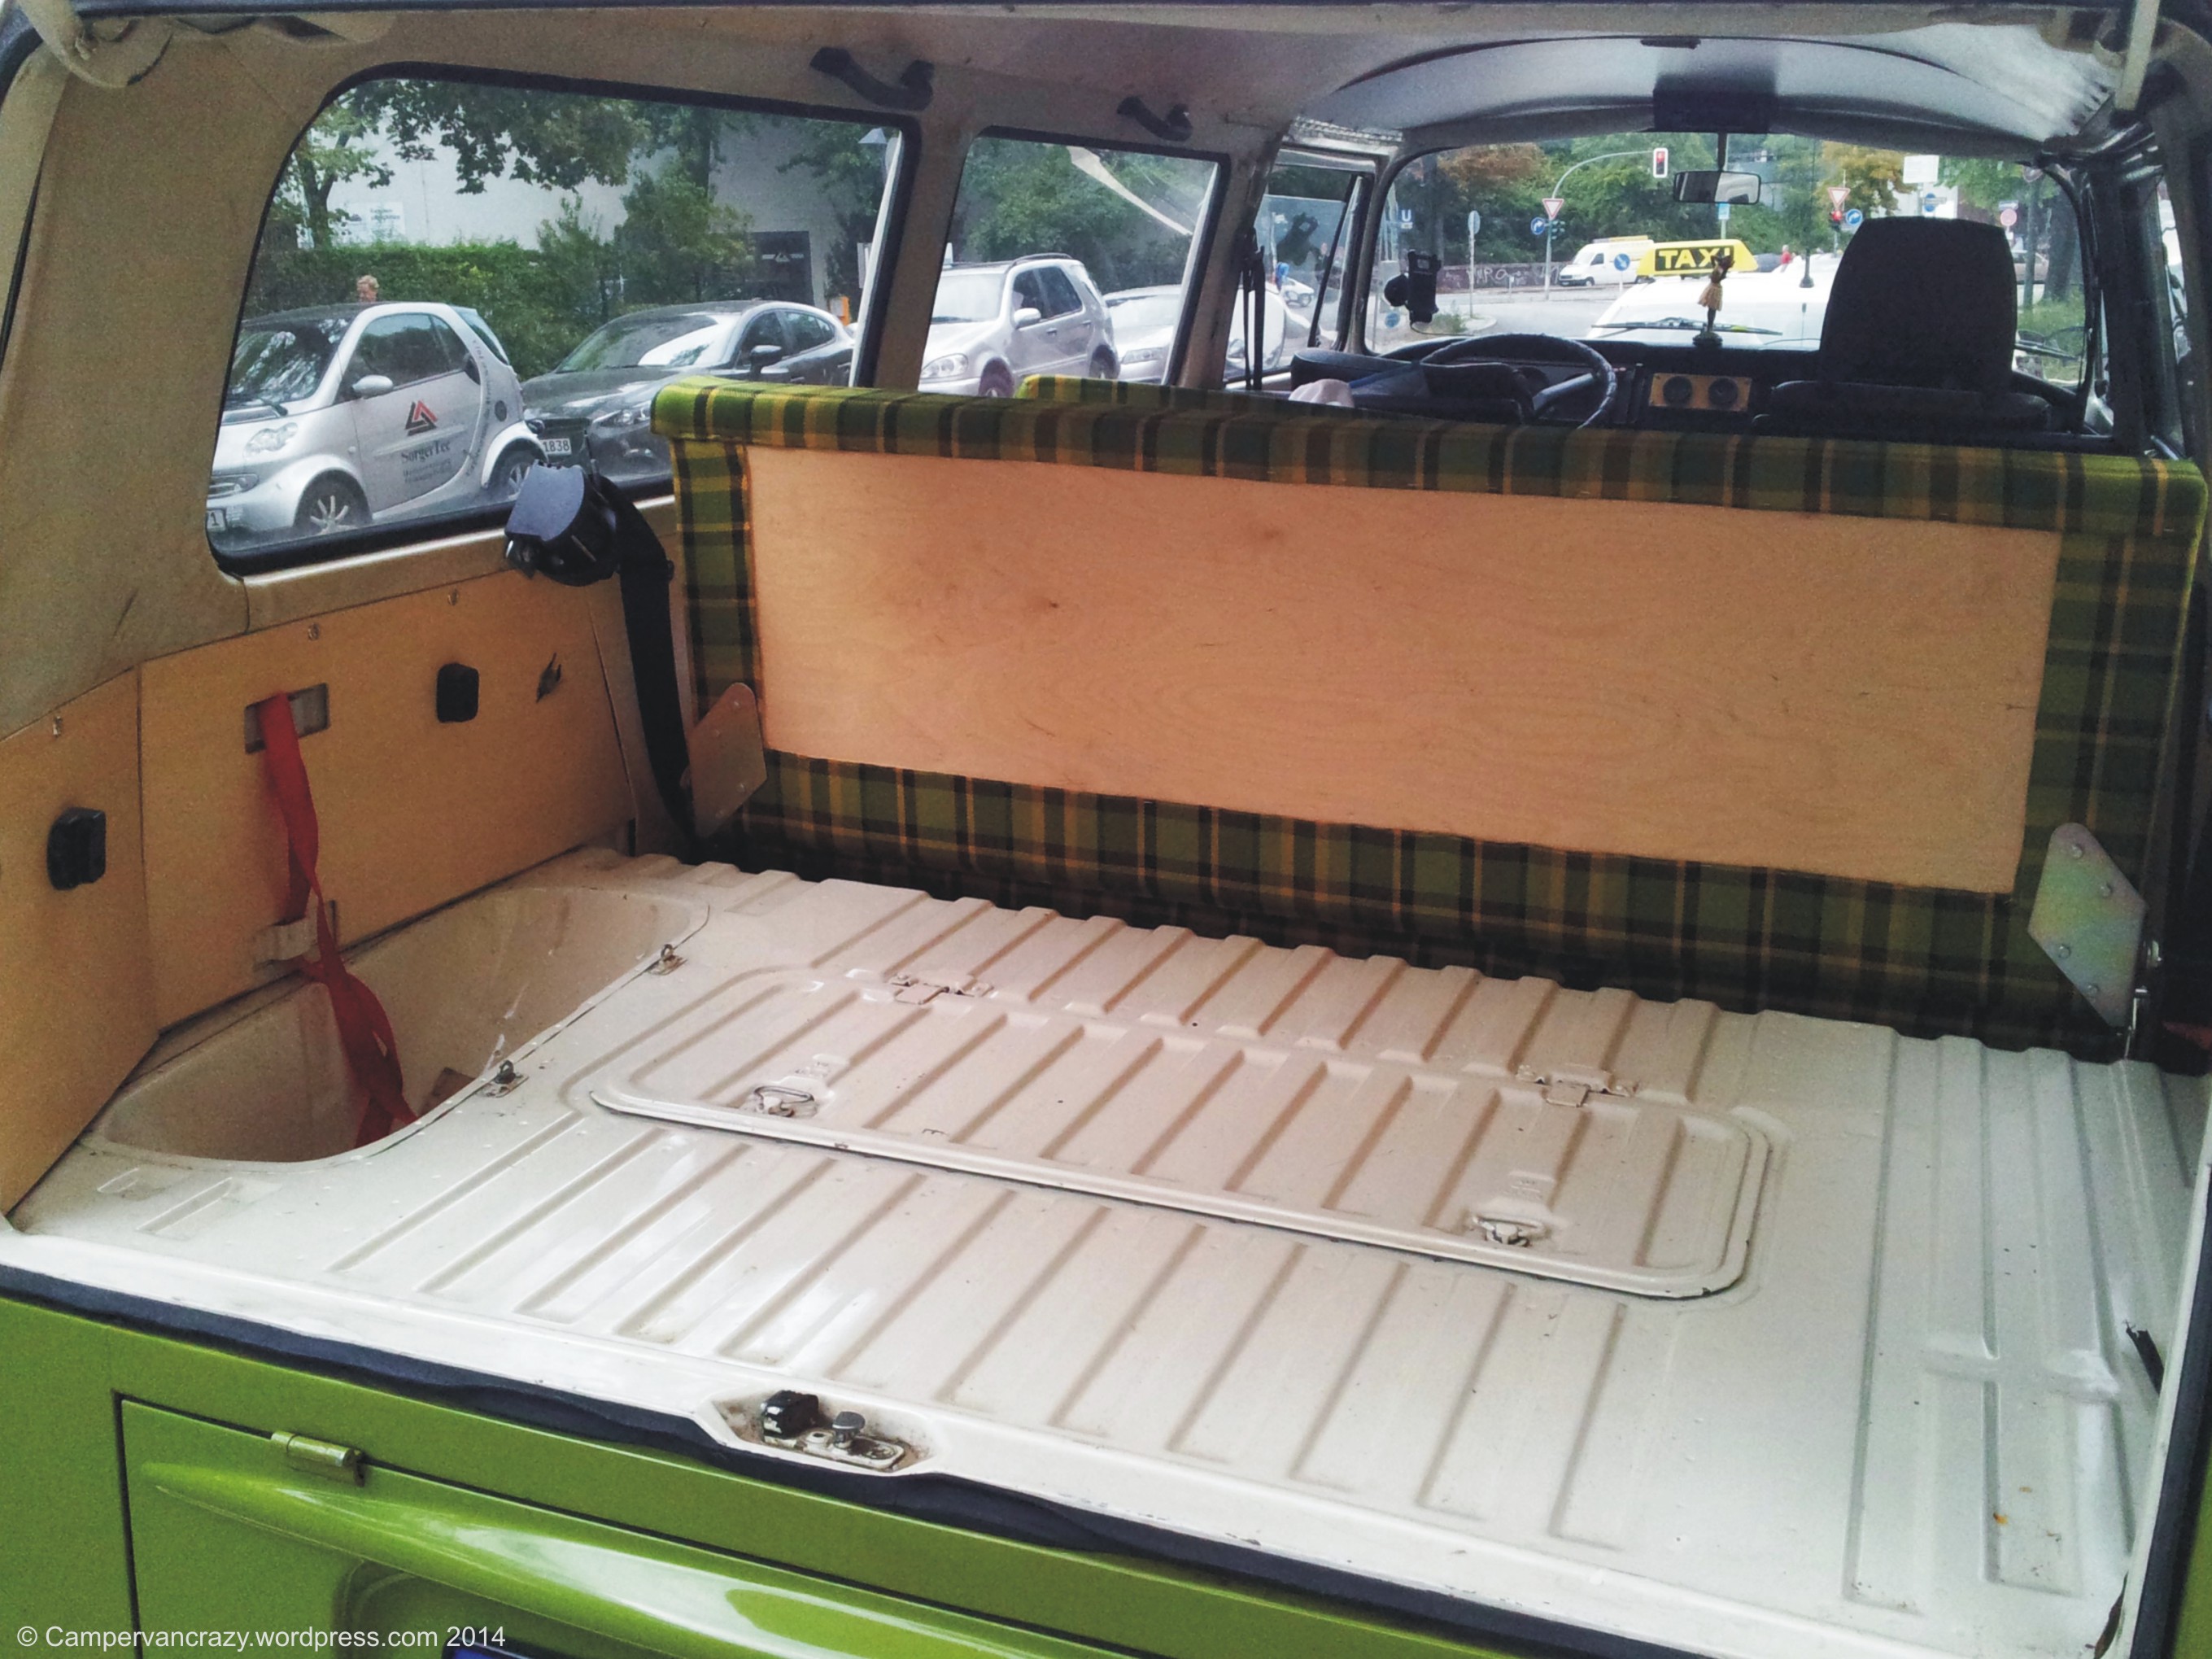
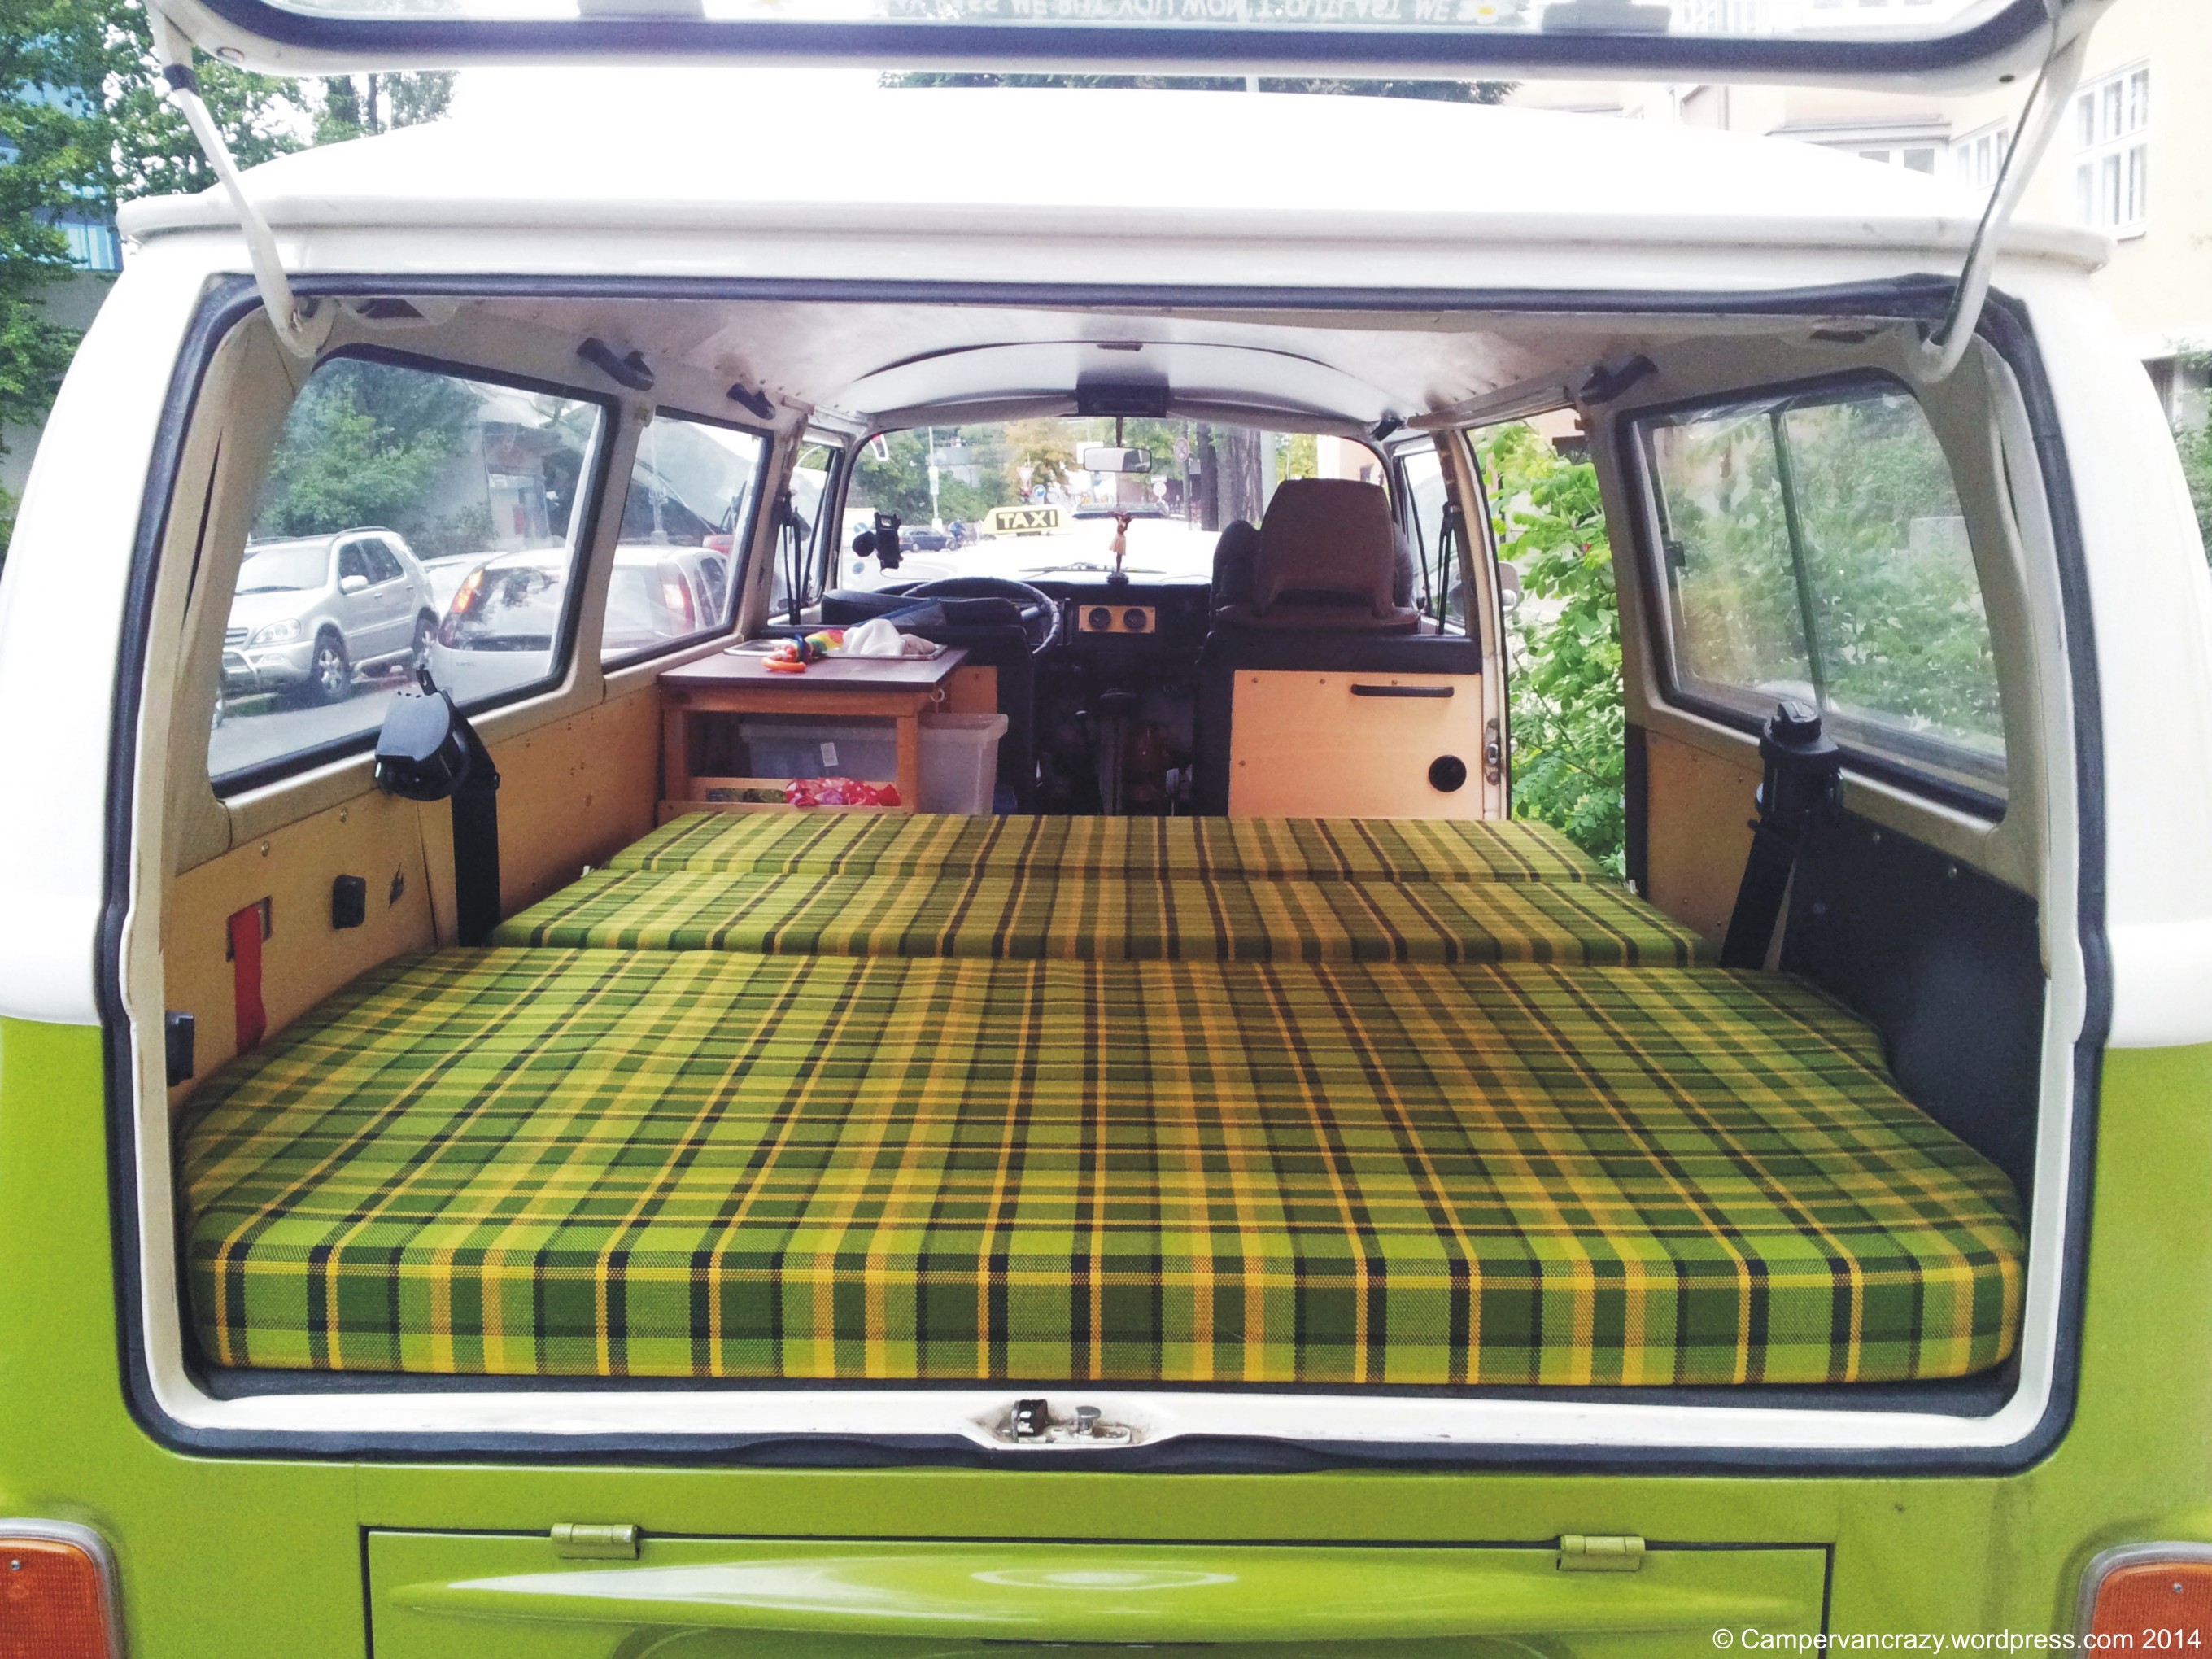
Rock-and-roll bench/bed in the Old Lady, a 1978 T2b.

Bench in the Old lady pulled out into the bed position.

Brackets that stabilize the bed position from underneath.

Additional support with Reimo foldable table foot.